Most robot vacuums come with side brushes – but do you know why? What purpose do they serve? And are they necessary?
We will answer all of your questions about side brushes on robot vacuums and cover everything from why they’re included on most models to how often you should replace them.
Plus, we’ll give you some tips on how to clean them if needed.
Their Purpose
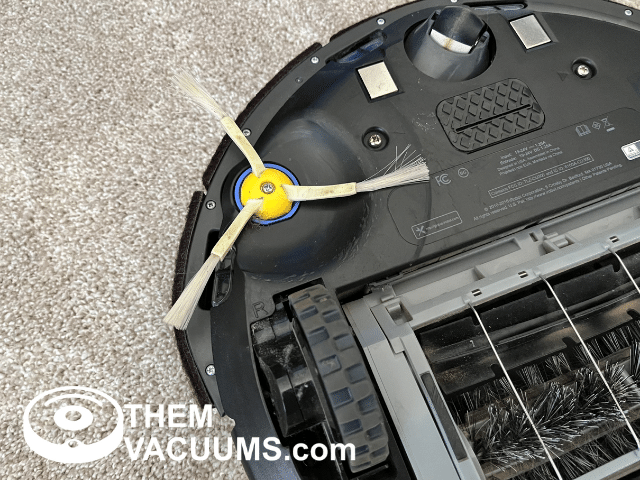
The main purpose of side brushes on robot vacuums is to help clean along edges and in tight spaces.
They are especially useful for getting dust and dirt out of corners and other hard-to-reach areas.
Most models come with one side brush, usually on the right, but a few models come with two.
Makes Your Bot’s Job Easier
Side brushes are great for picking up dust and dirt that a regular vacuum might miss, like around corners and under furniture.
They also help to loosen stubborn dirt and debris so that the vacuum can pick it up more easily.
Basically, they make your robot vacuum’s job a lot easier – and your home a lot cleaner!
The side brushes also work as scoopers to shovel the dirt into the robot vacuums intake. The side brushes reach farther out than the intake, and getting the guided help from the brushes is quite useful.
Do keep in mind, however, that side brushes will wear down over time.
So, you’ll need to replace them 6 months, if not sooner.
Another thing to note is that side brushes can sometimes get tangled with pet hair or other debris. If this happens, simply remove the brush and clean it off.
Not Every Model Has Them
No, not all models come with side brushes.
Most models do have at least one side brush, and some even have two. Having more side brushes doesn’t it’s better, but having at least one is ideal.
There are a few models that don’t have any side brushes, as they’re design to clean larger areas.
Or they use a lot of suction and don’t need the brushes.
If you can, buy the robot vacuums with side brushes, as they tend to do a better job of cleaning. Though, there is one downside to the side brushes when it comes to hard floors and solid items like dog food. They can sling the items around and make more of a mess, the video below does a great job showing you how to fix this.
Can You Add Side Brushes To A Robot Vacuum?
In most cases, no, you can not add more side brushes. Most robot vacuums are not designed to accommodate additional side brushes, or add them if it did not come with them.
If you’re not sure whether your vacuum can use additional side brushes, consult the manual or contact the manufacturer.
Removing
You can remove the side brushes from many robot vacuums, it’s just a screw that holds them in. I’ve even seen a few people remove 2 of 3 brushes to keep them from flinging things around.
The robot vacuum will work without the side brushes, but may not clean as well.
Not everyone wants to use the side brushes and the robot vacuum manufacturer doesn’t always give you the option to turn them off in the app, so removing them will work for most.
Cleaning
You don’t need to clean your side brushes often – but it might be helpful in some cases.
For example, if your vacuum is having trouble picking up dirt or debris, it could be because the brushes are clogged with dirt and grime. In this case, removing and cleaning them can help.
You should also clean the side brushes if they become tangled with hair or other materials. As we mentioned before, this can happen from time to time – especially if you have pets.
Cleaning your side brushes is easy to do. Simply remove them (it’s often only one Phillips head screw) and use a small brush or toothpick to clear away any debris. You can also rinse them off with water if needed.
Replacing
Replacing the side brushes of your robot vacuum is super easy as you only need a Phillips head screwdriver.
First, flip over the robot and locate the side brush (it’s usually on the right side of the vacuum). Then, remove the single screw that’s holding it in place.
Once the screw is removed, you should be able to pull the side brush off easily.
To install the new one, just line it up with the holes and insert the screw. Tighten it until it’s snug – but don’t overtighten it.