There was a video that circulated the internet where someone’s robot vacuum running over dog poop, and it smeared it all over the home.
It was gross and everyone had a good laugh because something like this would never happen to us.
Well… I thought the same thing and then one day it happen to me.
Then it happens to several friends of mine.
It appears this is a bigger problem than we all thought. Since there is little to no info on what to do after your Roomba runs over poop I figured I’ll show you how I clean them and what to look for when doing so.
What You Need
- Gloves
- Rubbing alcohol
- Phillips head screwdriver
- Flathead screwdriver
- A pick
- New Brushes (Amazon Link Ad)
- Sandpaper or old toothbrush
- New Battery (Amazon Link Ad)
- Rag you don’t mind throwing away
Every robot vacuum I clean after it ran over feces will often need the brushes replaced. It’s not worth cleaning them when new ones are affordable.
A new battery is often needed because the waste can short out certain components and kill the battery.
Warranty?!
Running over dog or cat poop is not covered under your warranty.
But it doesn’t hurt to give iRobot a call.
Who knows what they’ll do, but what matters is that many people call them so they know how big of an issue this is and future Roombas won’t suffer.
The good news is that most of the Roombas that suffered this fate were easy to clean and were back to normal in a few hours.
Clean What You Can On The Outside
Take the robot vacuum outside and clean as much of it as you can.
Using rags you don’t mind throwing away and rubber gloves clean the robot vacuum as much as you can.
For the outside of the bot, you can use a damp rag or my favorite Simple Green. You want to avoid putting this directly on the robot vacuum and only apply water or cleaner directly to the rag.
The best and safest thing to clean your robot vacuum will be rubbing alcohol. Before you start cleaning with rubbing alcohol you’ll need to remove the battery as we show you in the next section.
1. Battery
Remove the canister from the robot vacuum.
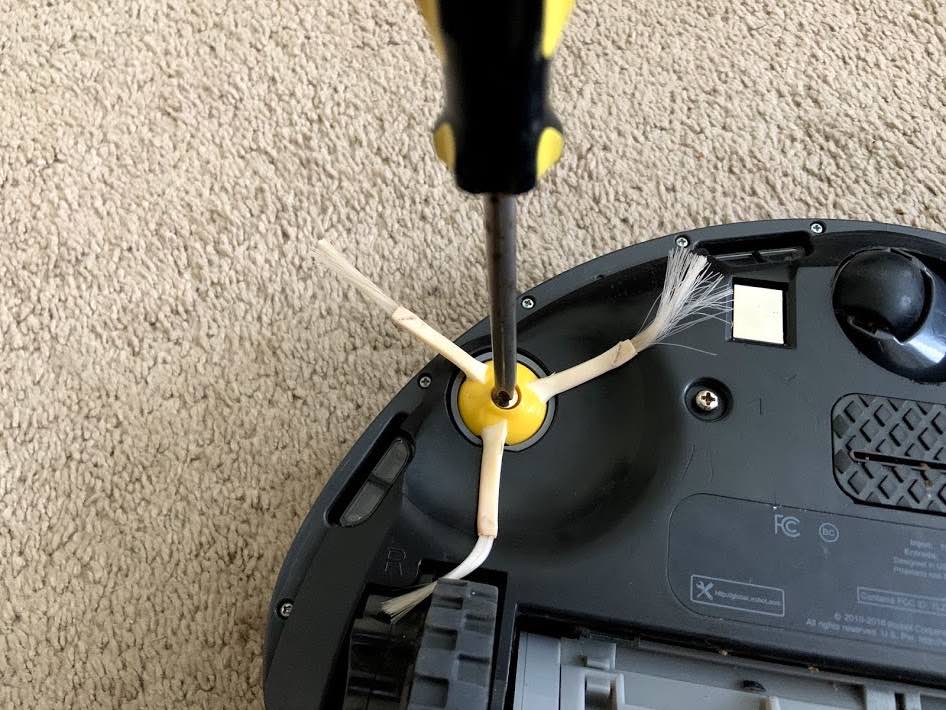
Flip the robot vacuum over and unscrew the yellow side brush.
Then remove the 4 screws holding the bottom plate on.
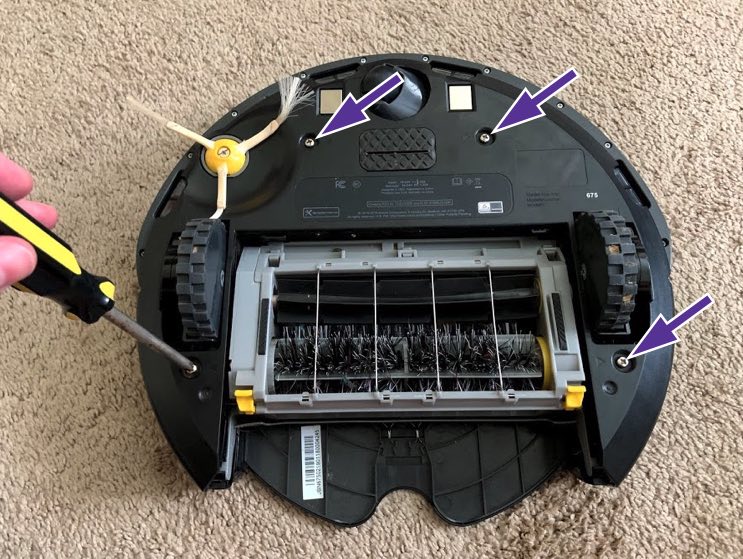
Once these screws are removed the bottom plate will come off with ease. You may need to use a flathead screwdriver to help lift it off.

With the cover off lift the battery out using the two tabs.
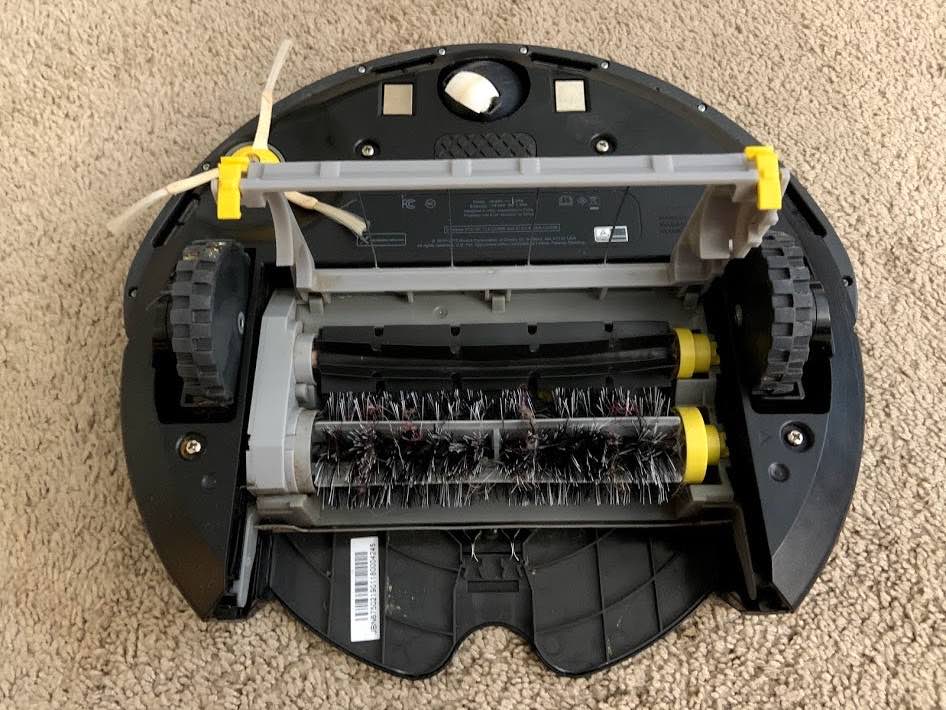
2. Replace Brushes
The two yellow tabs at the brushes allow you to remove the brushes.
You can go ahead and remove them and replace them with new ones. Brush kit on Amazon (Amazon Link Ad).
The Roomba I use in all the pictures was a friend of mine who already thoroughly cleaned it before giving it to me. I’m fully taking it apart to fix the spots that got corroded due to animal waste.
My friend thought he could save the brushes but it’s not worth it especially when new ones are affordable.
3. Brush Assembly

There are 4 chrome screws that hold the brush assembly.
Remove those screws and the brush assembly will lift off.
Clean under and around the newly exposed area using a rag and rubbing alcohol.
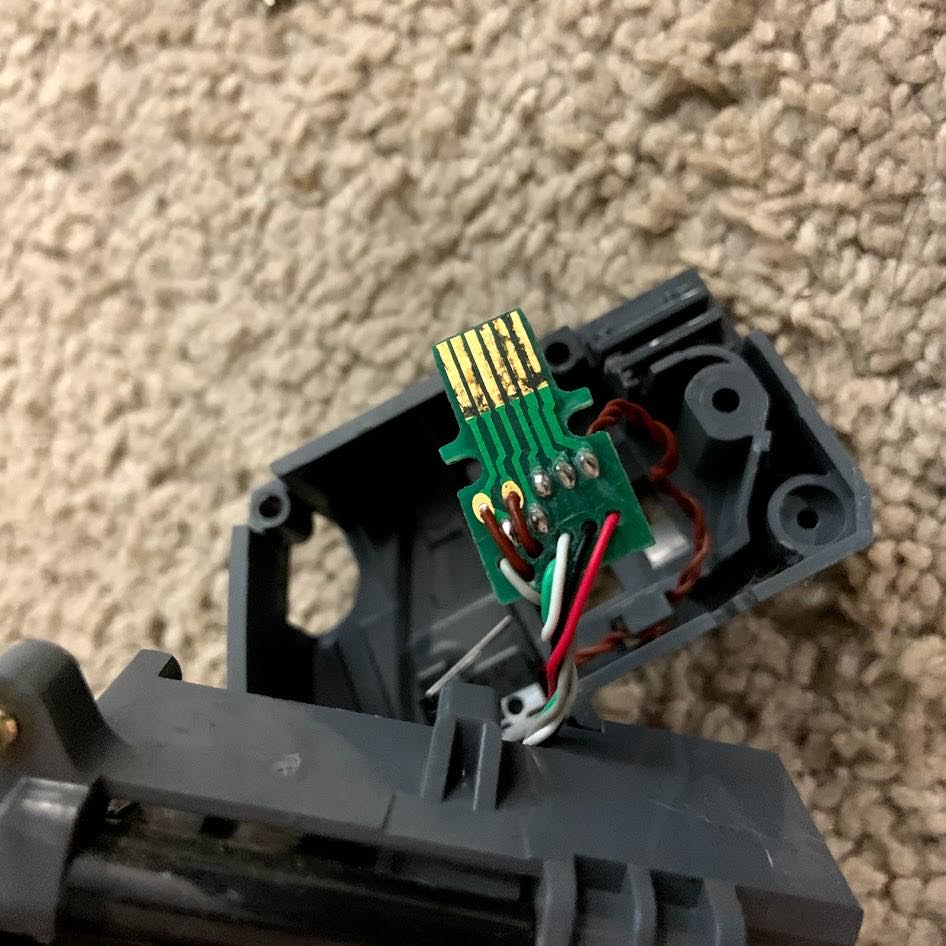
4. Brush Assembly Connector
There is one screw holding the connection that is used to power the brushes.

For this robot vacuum, it was badly corroded and needed to be cleaned.

It’s hard to make out in the picture above but the connector was very corroded and kept the brushes from working. It corroded due to animal waste.
Using fine-grit sandpaper or an old toothbrush very gently clean it. Often, you don’t even need either, and a wipe down with a rag and rubbing alcohol is all you need.
5. Wheels
The next thing you need to do is take the wheels off your Roomba robot vacuum.
The good news is that iRobot has made their Roomba’s super easy to work on and most everything is modular.
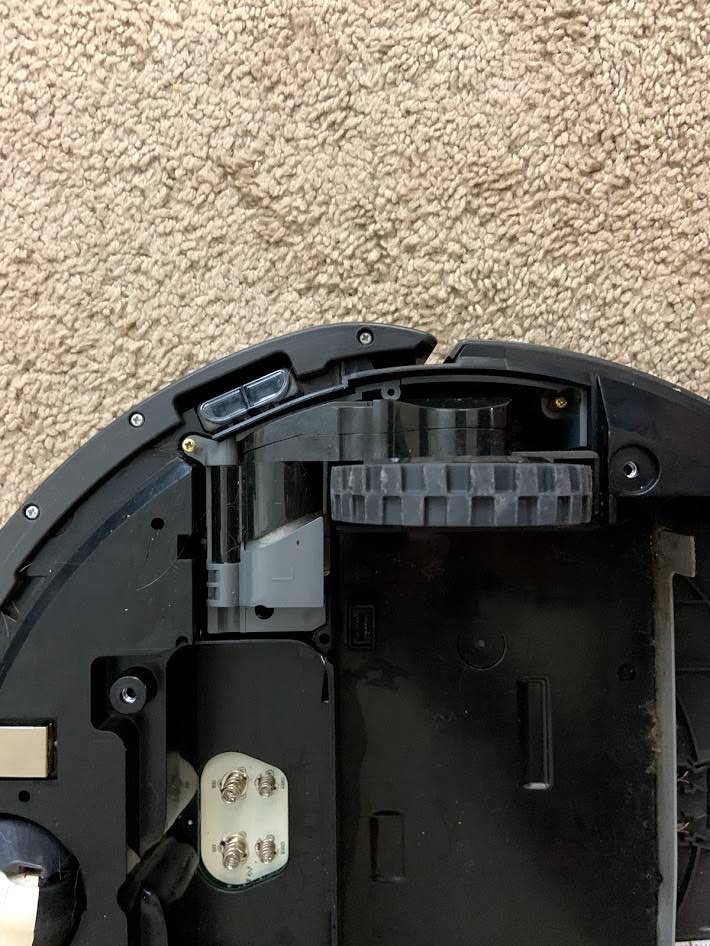
There is 3 screws that allow you to remove the wheel housing.
Once you have the wheel out you’ll notice the same connector the brush assembly used and it too needs to be cleaned.
Note: To get to this connector there is a spring under tension so be careful.
As you can see this connector was dirty but the corrosion was not as bad. It only needed to be wiped down on both sides with a rag and rubbing alcohol.
It’s amazing how the poop can get it in such hidden places.
With wheels out you can now clean under them and around them.
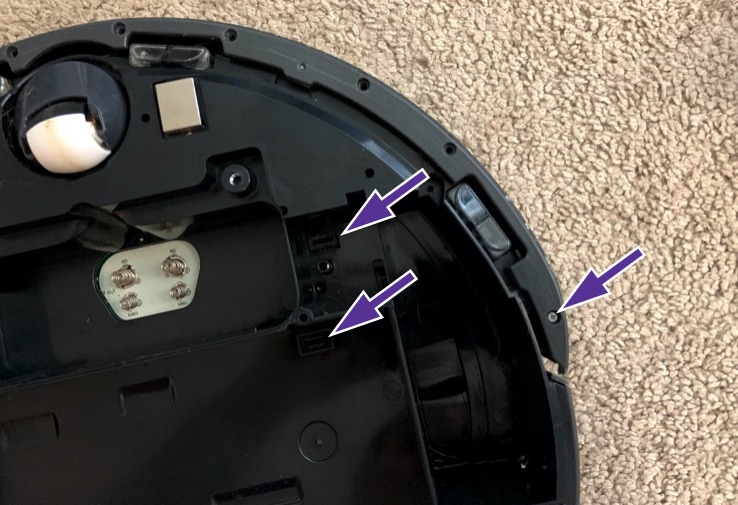
Don’t forget to clean the connection ports on the Roomba itself as the two arrows on the left point out.
The other arrow is pointing out the screws you need to remove for the bumper in the next section.
6. Front Bumper
The last picture in the section above showed the location of the screws you need to remove on the bottom of the bumper.
Those screws are what hold the bumper on.
There will be wires in the front for the sensors that are used for going home so don’t pull hard when removing the bumper.
7. Clean Under The Front Bumper

With the front bumper removed you can easily clean under it and the sensors too.
As you can see from the image above a lot of the junk hides under the bumper.
You should only use a rag and rubbing alcohol to clean this area.
While you’re at this spot, it would be an excellent time to clean that center wheel that is half black and half white. The Roomba uses that to measure distance and needs to be cleaned.
8. Top Plastic
With a pick or small flathead screwdriver remove the top plastic of the Roomba.

It feels tricky but those two spots at the rear seen above will release the plastic piece.
9. Unscrew Top Shell

With the top piece removed, you can see the screws that need to be removed.
Note: These screws come out completely and are small unlike many of the screws you’ve dealt with so far.
Lift on a corner of the top shell and it should easily come off and you’ll see this below.

10. Check Roomba Circuit Board
Now you can check the circuit board of the Roomba.

At the top middle of this board next to R70, you can see corrosion. This is not good.
If corrosion has made it this far to the circuit board then most of the time you either need a new board or get a new Roomba.
To clean this you need to gently wipe with a clean rag with rubbing alcohol.
Reassembly
To reassemble your Roomba is in reverse order of this guide.
I got to give it to iRobot as they make it easy to take and put these things back together.
Note: There is one tricky bit and that is the top buttons. When putting the top shell back on you don’t want to put too much force on the screws as it can keep the buttons from moving on top. You must also put the round piece back on correctly too or the top buttons might not move. Before putting everything back together all at once keep checking the top buttons can freely move at each step.
FAQ
Roomba still won’t turn on? – I’ve had a few that needed the battery replaced and they started working again. Something gets in there and shorts the battery out. Then I had a few like the one I used in the pictures that were so badly corroded on the motherboard that it was not worth fixing; the guy got a new robot vacuum instead. Replacement battery at Amazon (Amazon Link Ad).
How To Clean The Wheels Tracks? – Go outside and use a flathead screwdriver to pick the poop out.
Can I use a Garden Hose? – No, I would not use a hose and spray the Roomba. This will for sure void your warranty and do more damage. I think this is what happen to the guy whose robot vacuum I cleaned in the pictures used in this post. Soaking the robot vacuum and letting it dry will not help.
Buttons Not Working! – You screwed in the top shell too far or installed the plastic round piece wrong. You’ll need to remove it all again and fix it. You only need to lightly screw in the top shell screws. Keep checking the buttons to see if they work after putting pieces on.
Robot Won’t Work At All! – I get a few robot vacuums after running over poop that never works again. It sucks and not much you can do about it. Make sure the charging base is working and try a new battery. If those don’t work, then the robot vacuum is a goner.