I love robot vacuums, I have a whole website about them, but the main one I use around the home has a problem that all of them have… they stand out, are in the way, and don’t look that great out in the open.
I wanted a storage place for my Roomba and other robot vacuums I have around my home that was hidden and didn’t take up a lot of space.
While searching for options I found many, even wrote about many of them too, but they were either too expensive or just not perfect for my needs. So, I created a hidden robot vacuum garage that allows me to place things like shoes, plants, trash cans and whatever else on top of it to maximize space.
In this post, I want to show you how you can make your own robot vacuum hide-away storage shelf for cheap and to your own needs!
Hide-Away Storage Shelf
I’m not quite sure what to call this thing, as there are many names for it. It can be a shelf, little garage, hide-away spot, deck, pedestal and so on…
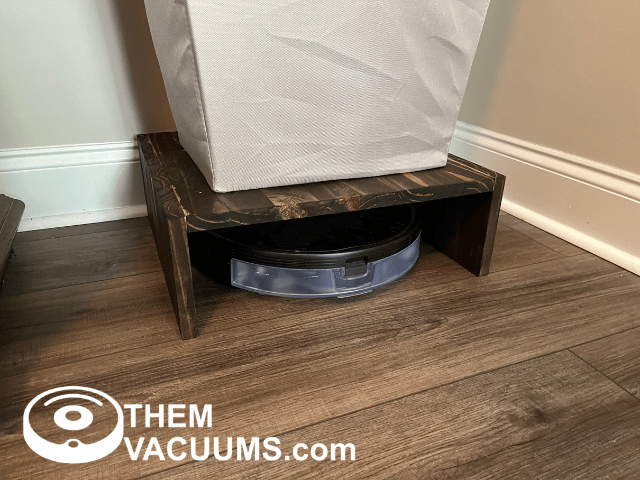
The name will depend on what you use it for, so here are a few images to see how it fits in your home or where to put it.
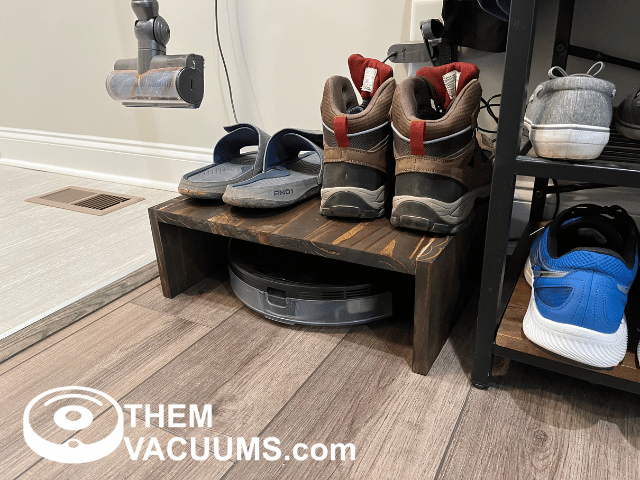
The above image is how I use the hide-away robot vacuum storage in my house. I keep it in the mud room as that is the dirtiest room in the home. I also keep shoes on top of it, so it’s not taking away space.
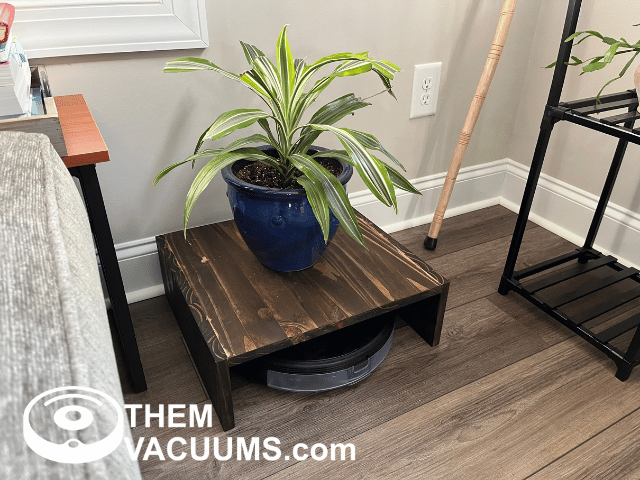
Another great option is to make it into a plant stand. You can hold quite a few small plants on the base and with the right color or stain it will look amazing in your home. At least, it will look better than an uncovered robot vacuum with all its wires hanging out.
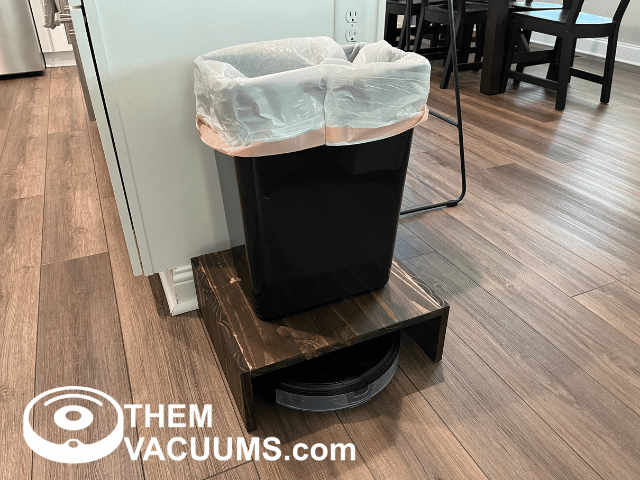
The robot vacuum hide-away shelves works great as a trash can pedestal, too.
Utilizing the vertical space more also keeps people from tripping over the robot vacuum, as they sit very low to the ground and can easily blend in.
How To Build It
What you need to build this is listed below.
- Wood (16 in x 4 ft Project Board)
- Corner brackets (Amazon Link Ad)
- Wood glue (Amazon Link Ad)
Painting or staining is up to you, I wanted a farmhouse worn look that somewhat matched our dark floors and other dark wood in our home. If anyone is wondering, I used Minwax Dark Walnut.
I went with a project board wood that is 16 inches by 4 feet long. 16 inches covers the robot vacuum nicely and a project board is cheap, and has the rougher look I’m looking for as it’s multiple scrap pieces glued together.

You could use a 1 x 12 piece of wood for a better look, but I find 16 inches hides the robot vacuum way better.
Cut List
Cutting the shelf is super easy, often, the home improvement store will even do it for you.
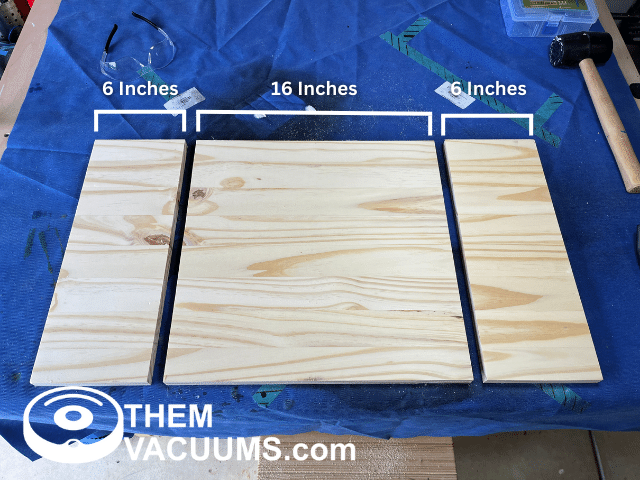
You will need one board that is cut to 16 inches and two boards that are cut to 6 inches. The 6-inch pieces will be your legs.
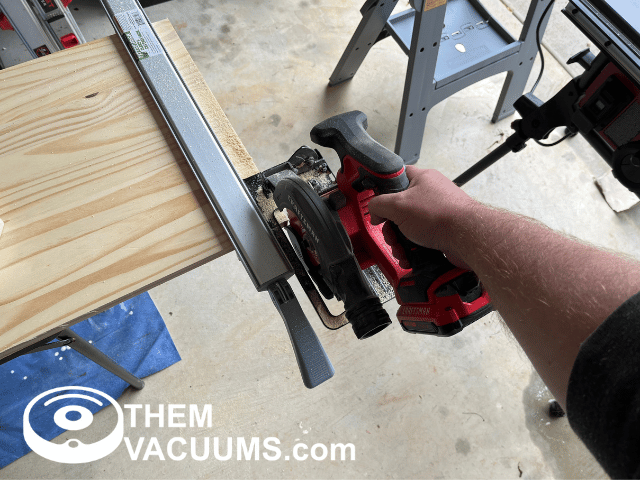
I used a simple circular saw to cut my wood and used a circular saw guide to give me a perfect cut. You can use another piece of wood that is straight as a guide instead.
Assembly
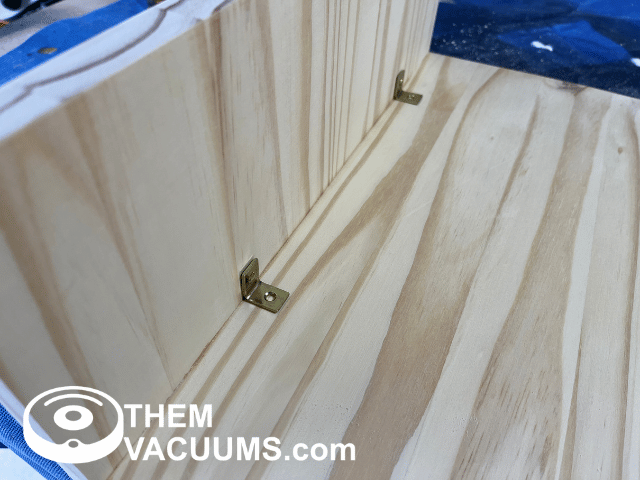
To assemble, you line the legs up, put glue on the joint, and screw it down with the angle brackets.
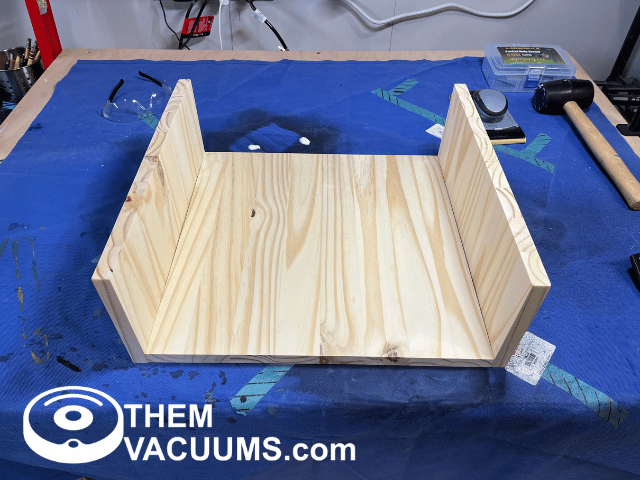
Most of the strength will come from the wood glue, but the angle brackets are simple and hold everything in place while it dries.
You can avoid using wood glue if you use more angle brackets. This will greatly accelerate the project and be good enough, plus it’s easier to fix if one of the legs breaks.
Allow the wood glue to dry overnight.
Tip: While the glue dries, put something that is 16 inches long between the two feet, so it doesn’t dry with the legs closing on each other. If you have clamps, apply pressure on the glue joints.
You can also use pocket holes or dowels if you have them. I figured the angle brackets are the simplest, and you won’t notice them because you put them on the inside. I ended up using dowels for mine because I had the tools available.
You can get a pocket hold jig here (Amazon Link Ad) and a dowel jig here (Amazon Link Ad). Pocket holes are easier and more forgiving if you’re new to woodworking. Pocket holes are quite strong too!
Sand And Seal
After letting the glue dry overnight, it’s best to sand the stand.
If you’re using a project board like I am, they tend to be pretty smooth and don’t need to be sanded much. It’s best you don’t over sand them, but I did go over the project manually with 220 grit sandpaper.
If you want the natural look, you’re done! For extra protection, you can apply a clear sealer like polycyclic (Amazon Link Ad).
If you don’t want the natural look, you need to stain or paint your project. Stain and paint will be whatever you want, so explore the isles of your local hardware store for options.
Black or white interior paint will be the cheapest options, I was originally going to do mine white to match the trim in our home. You may even have some extra paint around your home from other projects that you can use!
Buy vs. Build
You can buy a few robot vacuum hide-away stands, but they can get costly in comparison to this easy and cheap DIY build.
With a few cuts and a few screws, you can have your own hide-away robot vacuum stand at a fraction of the cost!
Overall, it’s a simple project that solves a unique problem. I’m kind of surprised that the robot vacuum manufacturers don’t offer a solution themselves, as these things do rob you of some space.
More Robot Vacuum Tips
To get more robot vacuum tips and tricks, check out my guide here.