Maintaining your trusty vacuum cleaner is a must-do chore that can make a world of difference in your home’s cleanliness and the lifespan of your cleaning companion. Neglecting this task can spell disaster – not only will your vacuum lose its mojo, but your home will suffer from the lurking dirt and dust.
But fear not! We’re here to show you the ropes on how to give your vacuum the TLC it deserves. We’ll cover every nook and cranny, ensuring your vacuum stays in tip-top shape for years to come.
So, get ready to roll up your sleeves, grab your vacuum, and let’s dive into the world of vacuum cleaner maintenance. Say goodbye to dusty nightmares and hello to a cleaner, happier home!
What Are The Two Reasons You Should Care?
Cleaning your vacuum cleaner is important for two main reasons:
The first reason is that it will improve the performance of your machine.
If there is a lot of dirt and dust inside, the vacuum will have to work harder to suction everything up. This can lead to premature wear and tear, and eventually, the vacuum will break down while also not clean your home as well.
The second reason is that it will help to extend the life of your vacuum.
A well-maintained vacuum cleaner can last for many years.
Think of it like this, would you use the same dirty rag to clean your kitchen? Using the same dirty vacuum cleaner all the time to clean your home is like cleaning your home with the same dirty rag all the time. You’re not cleaning, just shifting dirt around, so a clean vacuum cleaner is a must!
How To Clean A Vacuum Cleaner
We’ve listed the steps you must take to clean your vacuum cleaner below.
Before you begin, make sure to unplug the vacuum cleaner or remove the battery!
1. Air Filters
One of the most important parts of the vacuum to clean is the air filters. These are responsible for trapping dust and dirt so that it doesn’t enter into the motor.
To clean the air filter, simply remove them from the vacuum and wash them with warm water. Only clean the air filters if they’re the washable kind, the paper filters must be replaced.
Let them dry overnight before you put them back in the vacuum cleaner.
2. Canister
The vacuum cleaner’s canister should be removed from the vacuum cleaner and the outer and inner compartments separated.
The outer compartment is the clear plastic with no other parts attached, this means no electrical or filters parts.
This outer part can be cleaned in the sink with dish soap and warm water. Allow this part to dry overnight before putting it back together.
The inner part will have holes and other components to it and must not go in the sink. For this part, use compressed air and a scrub brush to clean all the parts. You can use the canned air or if you have an air compressor you can use that. It’s always a good idea to have an air duster like these around the home. (Amazon Link Ad) You could even use an electric leaf blower if you have one, they work quite well too.
Once you blow out the inner canister, you can use a damp rag to clean it even more. Make sure to let this inner canister dry overnight before using it again.
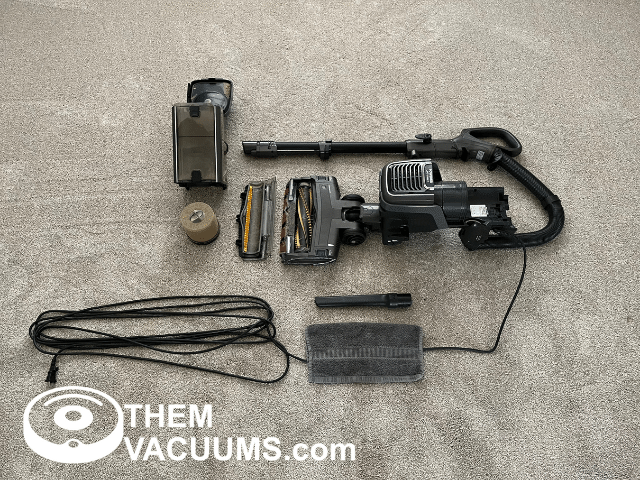
3. The Hoses And Attachments
Remove all the hoses and attachments from the vacuum cleaner and place them in the sink and clean them with dish soap and warm water.
If the hoses have a clog, shove a broom handle through the hose to clean it out before putting them in the water. Sometimes toys and other items get jammed in the hose and need to be forcibly removed.
Do not put the attachments that use electrical power in the water, so no powered brush heads in the sink, but everything that is not electrical or filter can soak in the water. Let them sit in the sink for a bit and then wipe them clean. Allow these items to dry overnight before using them.
4. Beater Bar
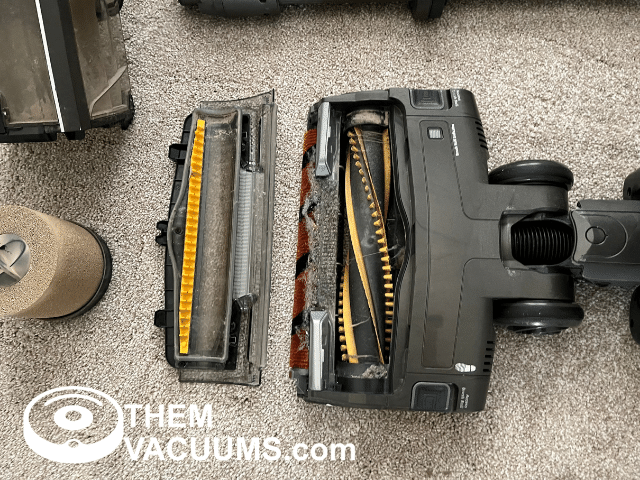
The beater bar is the brush that rotates under your vacuum cleaner. This brush is bad at catching hair and dust, so it needs to be clean.
To clean this brush, first, remove it from the vacuum. Then use a pair of scissors to cut away any hair or string that is wrapped around it.
After you’ve cut away the debris, use a small brush to remove any dirt and dust that is clinging to the bristles. Feel free to let this brush sit by itself in the soapy water to further clean it of dirt, but let it dry overnight before putting it back in the vacuum cleaner.
Keep in mind, the beater brushes wear out over time and get shorter. The shorter the brush, the less effective it is at cleaning. So if the brush is 2 to 3 years old, it’s a good idea to get a new one.
5. Wipe Everything Else Down
The rest of the vacuum cleaner, like the handle and other plastics, can be blown out with the duster and wiped down with a damp rag.
Allow the whole vacuum cleaner to dry overnight before you put it back together or clean with it.
Make Sure To Do Yearly Maintenance
You should aim to clean your vacuum cleaner every year.
If you have pets or live in a dusty area, you may need to clean it more often.
Cleaning your vacuum is important because it helps the machine run better and last longer. A well-cared for vacuum can last up to 10 years, but one that isn’t cared for will only last a few years.
You also don’t want to be cleaning with the same dirty rag all the time, so a clean vacuum cleaner is the same. How are you going to clean your home if the thing you use is dirty too?
Please Don’t Put Your Vacuum Cleaner In The Dishwasher
You cannot put vacuum cleaner parts in the dishwasher.
The heat from the dishwasher will destroy the plastic parts, and the water jets will get into places they shouldn’t.
You should also avoid putting the vacuum cleaner parts in the washing machine too.
Avoid Getting Your Vacuum Cleaner Wet
Never use a garden hose to clean your vacuum cleaner.
Your vacuum cleaner has electrical parts that will get destroyed if you get them wet. A garden hose and “hosing down” your vacuum cleaner will only destroy it.
If you already did this and need to fix it, the best thing to do is take it apart and let it dry for 3 days. Hopefully, the vacuum cleaner didn’t get destroyed and will come back. If you can, take the vacuum cleaner to a repair shop and let them look at it to see what parts are now bad.